

As a leading bolts supplier, we understand the importance of proper bolt installation. Incorrect installation can lead to a variety of problems, including reduced joint strength, premature failure, and safety hazards. In this blog post, we will provide you with a comprehensive guide on how to install bolts correctly, covering everything from pre - installation checks to post - installation inspections.
Pre - installation Checks
1. Select the Right Bolt
The first step in correct bolt installation is choosing the appropriate bolt for the application. Consider factors such as the load requirements, environmental conditions, and the type of materials being joined. For example, if you need a high - strength bolt for a heavy - duty application, our High Strength Hex Bolt Din 931 Cl 8.8 is an excellent choice. It is designed to withstand high tensile and shear forces, making it suitable for industrial machinery and structural applications.
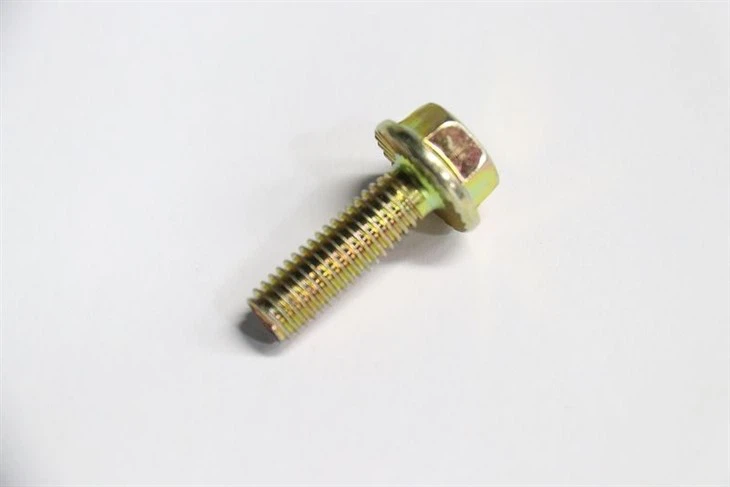
If you are working with a joint that requires a locking feature, our High Strength Din 6921 Cl 8.8 may be more appropriate. These bolts have a serrated flange that provides additional resistance to loosening due to vibration.
For applications where you need a bolt that can be installed in a threaded hole without a nut, our Carbon Steel Stud Bolt is a great option. They are commonly used in engines, boilers, and other equipment.
2. Check the Bolt and Nut Condition
Before installation, carefully inspect the bolts and nuts for any signs of damage, such as cracks, burrs, or corrosion. Damaged bolts or nuts may not provide a secure connection and can lead to failure. If you find any damaged components, replace them with new ones.
3. Prepare the Joint Surfaces
The surfaces where the bolt will be installed must be clean, flat, and free of debris. Any dirt, oil, or rust on the joint surfaces can reduce the friction between the bolt and the joint, leading to loosening. Use a wire brush or a suitable cleaning agent to remove any contaminants. If the surfaces are not flat, use a grinder or a milling machine to ensure a proper fit.
Installation Process
1. Insert the Bolt
Align the bolt holes in the two components to be joined. Make sure the holes are clean and free of debris. Insert the bolt through the holes, ensuring that it passes through smoothly. If the bolt does not fit easily, do not force it. Check for misaligned holes or burrs and correct the issue before proceeding.
2. Add the Nut
Once the bolt is inserted, place the nut on the end of the bolt. Hand - tighten the nut until it is snug against the joint surface. This helps to ensure that the bolt is properly seated and aligned.
3. Tighten the Bolt
The most critical step in bolt installation is tightening the bolt to the correct torque. Over - tightening can cause the bolt to break, while under - tightening can result in a loose joint. Use a torque wrench to apply the appropriate amount of torque. The torque value depends on several factors, including the bolt size, material, and the application.
You can refer to the manufacturer's specifications or industry standards to determine the correct torque value. For example, for a standard M12 bolt made of carbon steel, the typical torque value for a general - purpose application might be around 50 - 60 Nm. However, it is always best to consult the specific guidelines for your bolt.
When using a torque wrench, make sure to apply the torque gradually and evenly. Do not jerk or apply sudden force, as this can lead to inaccurate torque readings.
4. Locking Mechanisms
In some applications, it may be necessary to use a locking mechanism to prevent the bolt from loosening due to vibration or other factors. There are several types of locking mechanisms available, such as lock washers, thread - locking compounds, and self - locking nuts.
Lock washers work by creating a spring - like force that resists loosening. Thread - locking compounds are adhesives that are applied to the threads of the bolt or nut. They harden when the bolt is tightened, preventing the nut from backing off. Self - locking nuts have a built - in feature, such as a nylon insert, that provides resistance to loosening.
Post - installation Inspections
1. Visual Inspection
After tightening the bolt, visually inspect the joint to ensure that the bolt and nut are properly seated and that there are no signs of damage or deformation. Check for any gaps between the joint surfaces or signs of excessive tightening, such as stretched or cracked bolts.
2. Torque Check
It is a good practice to re - check the torque of the bolt after a short period of use, especially in applications where there is significant vibration or movement. This helps to ensure that the bolt remains properly tightened and that the joint is secure.
3. Long - term Monitoring
For critical applications, it may be necessary to monitor the bolted joint over time. This can be done through periodic inspections or by using sensors to detect changes in the joint's condition. If any issues are detected, take appropriate action, such as retightening the bolt or replacing it if necessary.
Conclusion
Proper bolt installation is essential for ensuring the safety and reliability of your equipment and structures. By following the steps outlined in this guide, you can minimize the risk of bolt failure and ensure a secure joint.
As a trusted bolts supplier, we are committed to providing high - quality bolts and nuts that meet the highest industry standards. If you have any questions about bolt selection, installation, or any other aspect of our products, we encourage you to contact us for a detailed discussion. Our team of experts is always ready to assist you in finding the best solutions for your specific needs. Whether you are working on a small DIY project or a large - scale industrial application, we can provide you with the right bolts and the knowledge to install them correctly.

References
- Machinery's Handbook, 31st Edition
- American Institute of Steel Construction (AISC) Specification for Structural Steel Buildings
- International Organization for Standardization (ISO) standards related to bolts and nuts